

We have seen some introduction about Meteor in the previous article now let’s create a simple application where user can able to Creat, Read, Update and Delete contents..
Create
` mrt create meteor-crud `
Lets remove the default content..
we are going to use bootstrap-flatly theme for ui and CoffeeScript to write template manager..
First we can prepare our HTML file to render the posts then we can use our template manager to make the content reactive..
  # posts.html
  <head>
    <title>meteor-crud</title>
  </head>
  <body>
    <div class="col-md-6 col-md-offset-3">
      {{> postForm}}
      {{> posts}}
    </div>
  </body>
we have created two handlebar templates here, one to hold the form to enter the post and another one to show the posts.
now we can break these into individual templates and start filling it with required html contents.
postForm Template
<template name="postForm">
  <div class="form-group">
     <label class="control-label">Create post</label>
     <div class="input-group">
        <input type="text" id="content" class="form-control">
        <span class="input-group-btn">
          <button class="btn btn-success" type="button">Create</button>
        </span>
     </div>
  </div>
</template>
here we have created one input box with id content and one button to submit the post..
posts Template
<template name="posts">
  {{#each post}}
    {{> post}}
  {{/each}}
</template>
in posts template we have created a template helper called post to iterate through each post in the database collection and render the post template..
post Template
<template name="post">
  {{#if editing}}
    <input type="text"  value="{{content}}" />
  {{else}}
    <p>
      <span class="content col-md-10" id="edit"  >{{content}} </span>
      <button class="btn btn-sm btn-danger" id="delete" type="submit">Delete</button>
    </p>
    {{/if}}
</template>
in post template we have created a simple state called editing where the user is editing the content of the post..
if editing is set to true we are going to display an input box to change the content, otherwise a list of posts with a delete button.
Our final posts.html file would be like this.
# posts.html
<head>
  <title>meteor-crud</title>
</head>
<body>
  <div class="col-md-6 col-md-offset-3">
    {{> postForm}}
    {{> posts}}
  </div>
</body>

<template name="postForm">
  <div class="form-group">
     <label class="control-label">Create post</label>
     <div class="input-group">
        <input type="text" id="content" class="form-control">
        <span class="input-group-btn">
          <button class="btn btn-success" type="button">Create</button>
        </span>
     </div>
  </div>
</template>

<template name="posts">
  {{#each post}}
    {{> post}}
  {{/each}}
</template>

<template name="post">
  {{#if editing}}
    <input type="text"  value="{{content}}" />
  {{else}}
    <p>
      <span class="content col-md-10" id="edit"  >{{content}} </span>
      <button class="btn btn-sm btn-danger" id="delete" type="submit">Delete</button>
    </p>
    {{/if}}
</template>
check the code in github
now fire up the meteor server by executing mrt command inside /meteor-crud directory..
if you have done everything correctly you should see something similar to this in your browser
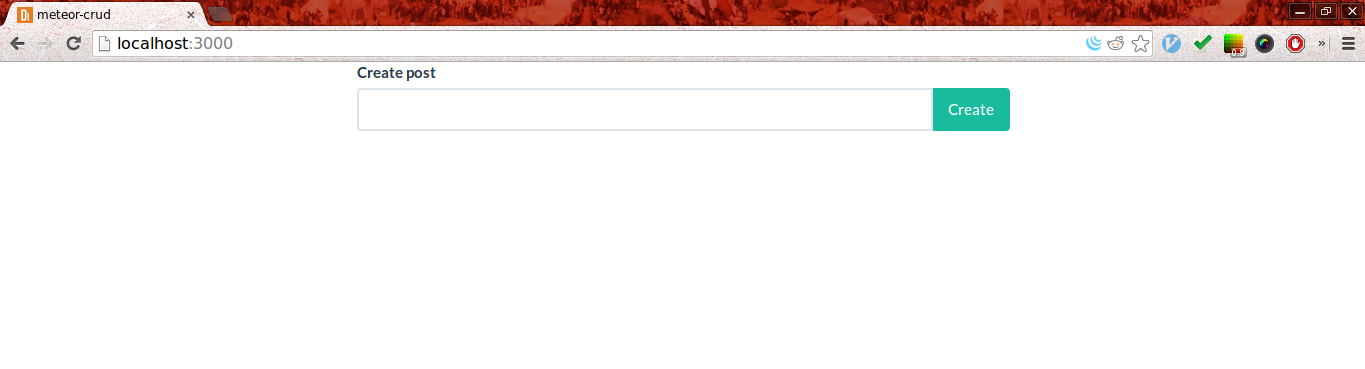
Let’s add a bootstrap navigation bar before our postForm template to make the app more elegant..
navbar
#post.html
...
...
<body>
  {{> navbar}}
  <div class="col-md-6 col-md-offset-3">
    {{> postForm}}
    {{> posts}}
  </div>
</body>
<template name="navbar">
  <div class="navbar navbar-inverse">
    <div class="navbar-header">
      <button type="button" class="navbar-toggle" data-toggle="collapse" data-target=".navbar-inverse-collapse">
        <span class="icon-bar"></span>
        <span class="icon-bar"></span>
        <span class="icon-bar"></span>
      </button>
      <a class="navbar-brand" href="#">Meteor Crud</a>
    </div>
  </div>
</template>
...
...
now our posts.html file should be like this..

Its time to make our static html template reactive using our posts.coffee template manager ..
First let’s create a MongoDB collection to hold the posts in the database..
@Post = new Meteor.Collection "post"

if Meteor.isClient
  ...
  ...
we just created a MongoDB collection called post using the Meteor.Collection method..
Note: This line of code should be outside the if Meteor.isClient block and we should use ‘@’ to make it global so that the post collection would be available to both client and server..
Create
  Template.postForm.events
    "click button": (e, t) ->
      data = t.find "#content"
      Post.insert content: data.value
      data.value = ""
Whenever the button inside our postForm template is clicked, we are going find the element with id “content” and store its value inside the variable called data and then we are inserting the data into our posts collection using Post.insert MongoDB command and finally we are setting the value of data to null to get the next item..
Now we can able to create posts..
The posts doesn’t show up yet in our page but we could see the post inside the mongo console by running meteor mongo inside /meteor-crud directory..
Note: your meteor server should be running while opening mongo console
Now lets make the posts available in our page..
Read
  Template.posts.post = ->
    Post.find()
We are creating a template helper called post that will return the data from Post.find()..The Post.find() Mongo query will return a cursor object that has all the posts form the post collection. This post helpers is used inside the posts template to iterate through each posts..
<template name="posts">
  {{#each post}}
    {{> post}}
  {{/each}}
</template>
now all the posts are available in our html template..

We have completed C and R in CRUD, now lets add Delete function in our template manager..
Delete
  Template.post.events
    "click #delete": (e, t) ->
      post = Post.findOne(t.data)
      Post.remove _id: post._id
Whenever the button with id “delete” is clicked, we are finding the target element and storing it in post variable and then we are passing its id to remove the post from the collection using Post.remove Mongo query..
_id is MongoDB unique id for each element in the MongoDB collection..
Update
Update part is bit tricker than other three operations..
  Template.post.editing = ->
    Session.get "target" + @_id

  Template.post.events
    "click #edit": (e, t) ->
      Session.set "target" + t.data._id, true

    "keypress input": (e, t) ->
      if e.keyCode is 13
        post = Post.findOne(t.data)
        Post.update {_id: post._id}, { $set: content: e.currentTarget.value}
        Session.set "target" + t.data._id, false
We can split this into three sections
  #1 setting the editing state
  Template.post.editing = ->
    Session.get "target" + @_id
Here we are getting the session variable with a key target and its value is mongodb id field..This will return either true or false based on the session value it gets..
  #2 change span to input box
  Template.post.events
    "click #edit": (e, t) ->
      Session.set "target" + t.data._id, true
In post template whenever the span with id “edit” is clicked we are setting the Session variable to true thereby the “editing” helper is set to true..As per our html template when editing state is enabled, input box would appear instead of span..
  #3 updating the post on hitting enter
  "keypress input": (e, t) ->
    if e.keyCode is 13
      post = Post.findOne(t.data)
      Post.update {_id: post._id}, { $set: content: e.currentTarget.value}
Here we are again finding the target element, storing it in post variable and using its id and value to update the appropriate post whenever enter key is pressed inside the input box..( keycode for enter key is 13)
MongoDB update query takes two argument 1. the id of the target element and 2. value to be updated..
MongoDB $set operator is used to update the collection..
This would be our final post.coffee template manager..
  @Post = new Meteor.Collection("post")
  if Meteor.isClient
    # create
    Template.postForm.events
      "click button": (e, t) ->
        data = t.find "#content"
        Post.insert content: data.value
        data.value = ""

    # Read
    Template.posts.post = ->
      Post.find()

    # update
    Template.post.editing = ->
      Session.get "target" + @_id

    Template.post.events
      "click #edit": (e, t) ->
        Session.set "target" + t.data._id, true

      "keypress input": (e, t) ->
        if e.keyCode is 13
          post = Post.findOne(t.data)
          Post.update {_id: post._id}, { $set: content: e.currentTarget.value}
          Session.set "target" + t.data._id, false

      # delete
      "click #delete": (e, t) ->
        post = Post.findOne(t.data)
        Post.remove _id: post._id
Check the code in GitHub
Since we are using CoffeeScript we don’t have to write return statements and we can also ignore brackets, semicolons etc..
Now our code is pretty clean and it is ready to do CRUD operations..
Its time to deploy our app in remote server and see the code in action.. :D
  mrt deploy meteor-crud.meteor.com
  Deploying to meteor-crud.meteor.com. Bundling...
  Uploading...
  Now serving at meteor-crud.meteor.com
As you can see when we create a post in one browser it is automatically gets updated in other browsers which are connected to the database..We didn’t write a single piece of code to make the content reactive, it is all done by meteor by default..